How to Shoot with Reflection Elements
Posted by Urs Recher on Sep 17th 2021
When shooting opaque objects like for example red wine bottles, the photographer works primarily with reflections. Light traveling through the object should only be used very carefully, as it might appear "illogical".
Transparent objects however are mainly captured with light traveling through the object and eventually additional light to show the texture and the reflective behavior of the object's surface. In this situation, we can increase the amount of light traveling through the object by "hiding" reflectors or even small lights behind it - as long as the set up allows this!

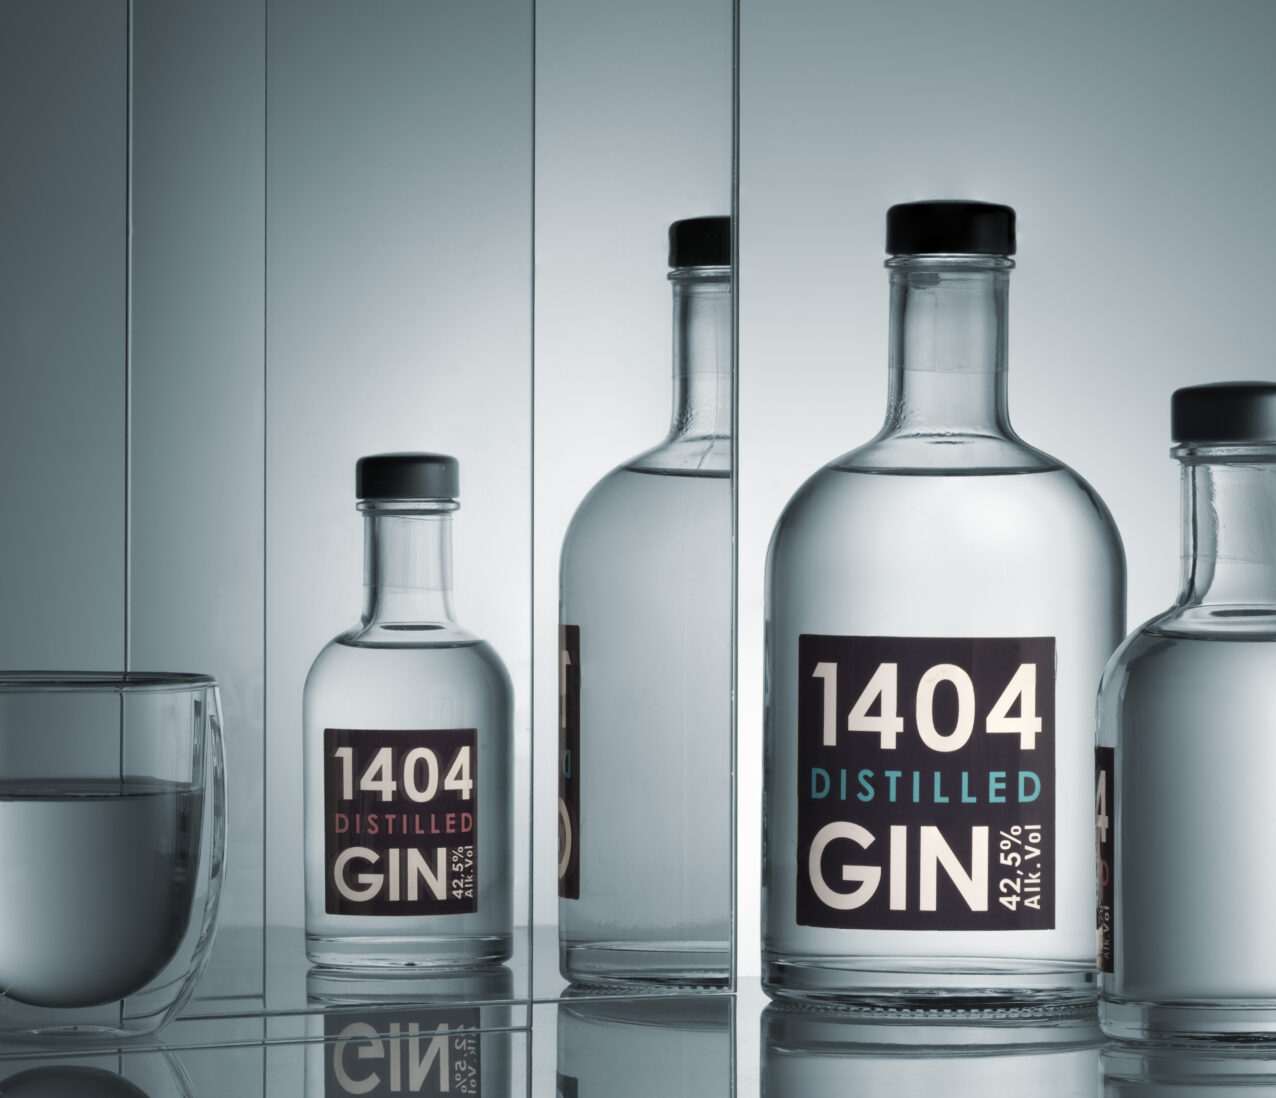
To photograph the two Gin bottles, I chose a different approach. I wanted to keep the viewer's attention longer, so I made the composition somewhat more complex by playing with different views and perspectives in one single shot. A mirror and a piece of glass were the tools to do this.
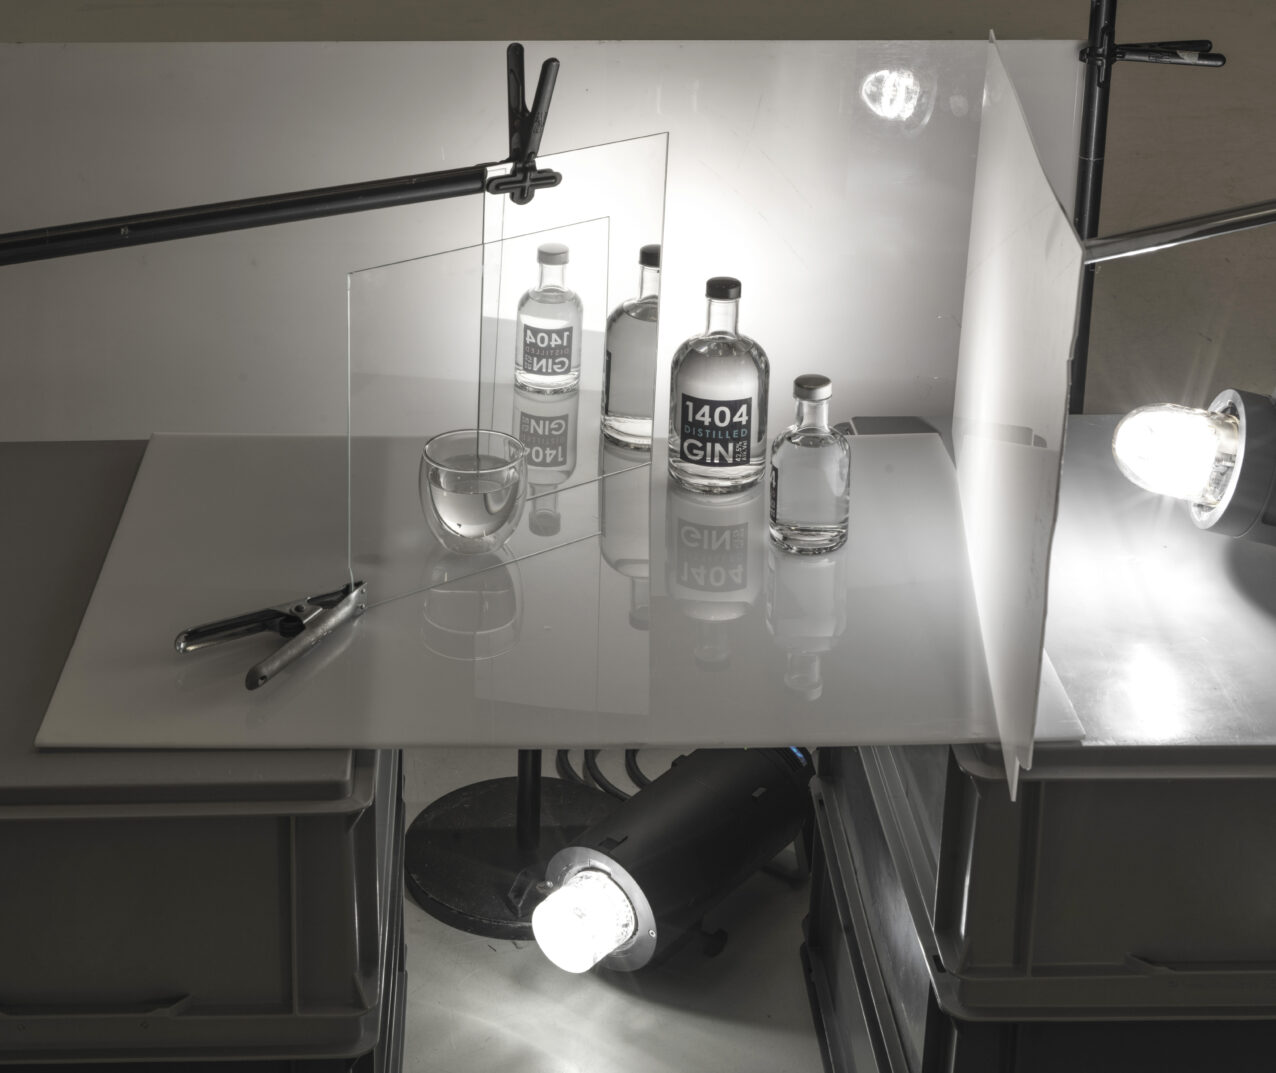
By adding these elements, illuminating the set became much more difficult. The light had to work in two different directions at the same time; the two perspectives varied by 90°. So it was impossible to use a hidden reflector behind the objects, and as the entire set was tiny, I had to ensure, that the lights I set up did not influence each other in an uncontrolled way.

Several acrylic diffusion panels and three bare flash tubes were finally used. I chose bare bulbs over reflectors (with grids) as they create smaller and higher contrast gradations on the diffusion panels. As the smaller of the bottles measured just about 14cm, this technique was essential to shape them properly.
In postproduction, I had to mirror the label of the smaller bottle and at the same time, I made the left half of the picture a little slimmer.
The picture is shot with a medium format camera and a focal length of 120 mm. The exposure time was 1/180 s and the aperture f/ 22 at ISO 100.
